Well, if any of you have attempted to make cake balls I'm sure you've noticed how temperamental the chocolate can be... WHOA. The first time I made them with my sister-in-law and all we could do is laugh and throw some sprinkles on them. They were tasty no doubt, but pretty? Eh not so much. With no hesitation I will share with you everything I've learned from reading and, of course, experience. This is post will NOT be a specific recipe, more of a how-to. I will definitely be sharing a couple of cake ball recipes I've designed myself in later posts. I will try to explain this as clearly as possible. Feel free to comment with questions or even suggestions.
Step #1: BAKE a cake!
- Choose a favorite cake recipe. It can truly be anything... boxed, homemade or a hybrid. You can bake the cake in any size pan, it doesn't make a difference and you will see why ;)
Step #2: CRUMBLE the Cake.
- Let the cake cool ALL THE WAY on a wire rack. Then crumble the cake into small pieces into a bowl that can be put in the freezer.
Step #3: MIX in the Icing.
- Choose any icing you want. Again, it can be homemade or from a jar! I personally like the flavor of the jar icing. BUT WAIT. Don't just dump the whole jar in. *Note* Every cake has a different amount of moisture so slowly add the icing until it seems each piece of cake has a little icing. Sometimes I use a half of a tub and other times three quarters of a tube. But if you put too much icing, it will be more difficult when dipping in chocolate because of the excess moisture and that my friends is a HUGE problem.
Step #4: FREEZE.
- Place the bowl of crumbled cake with icing in the freezer for around 15 minutes. The goal is to chill the cake mixture so it's not as sticky and it's easier to work with.
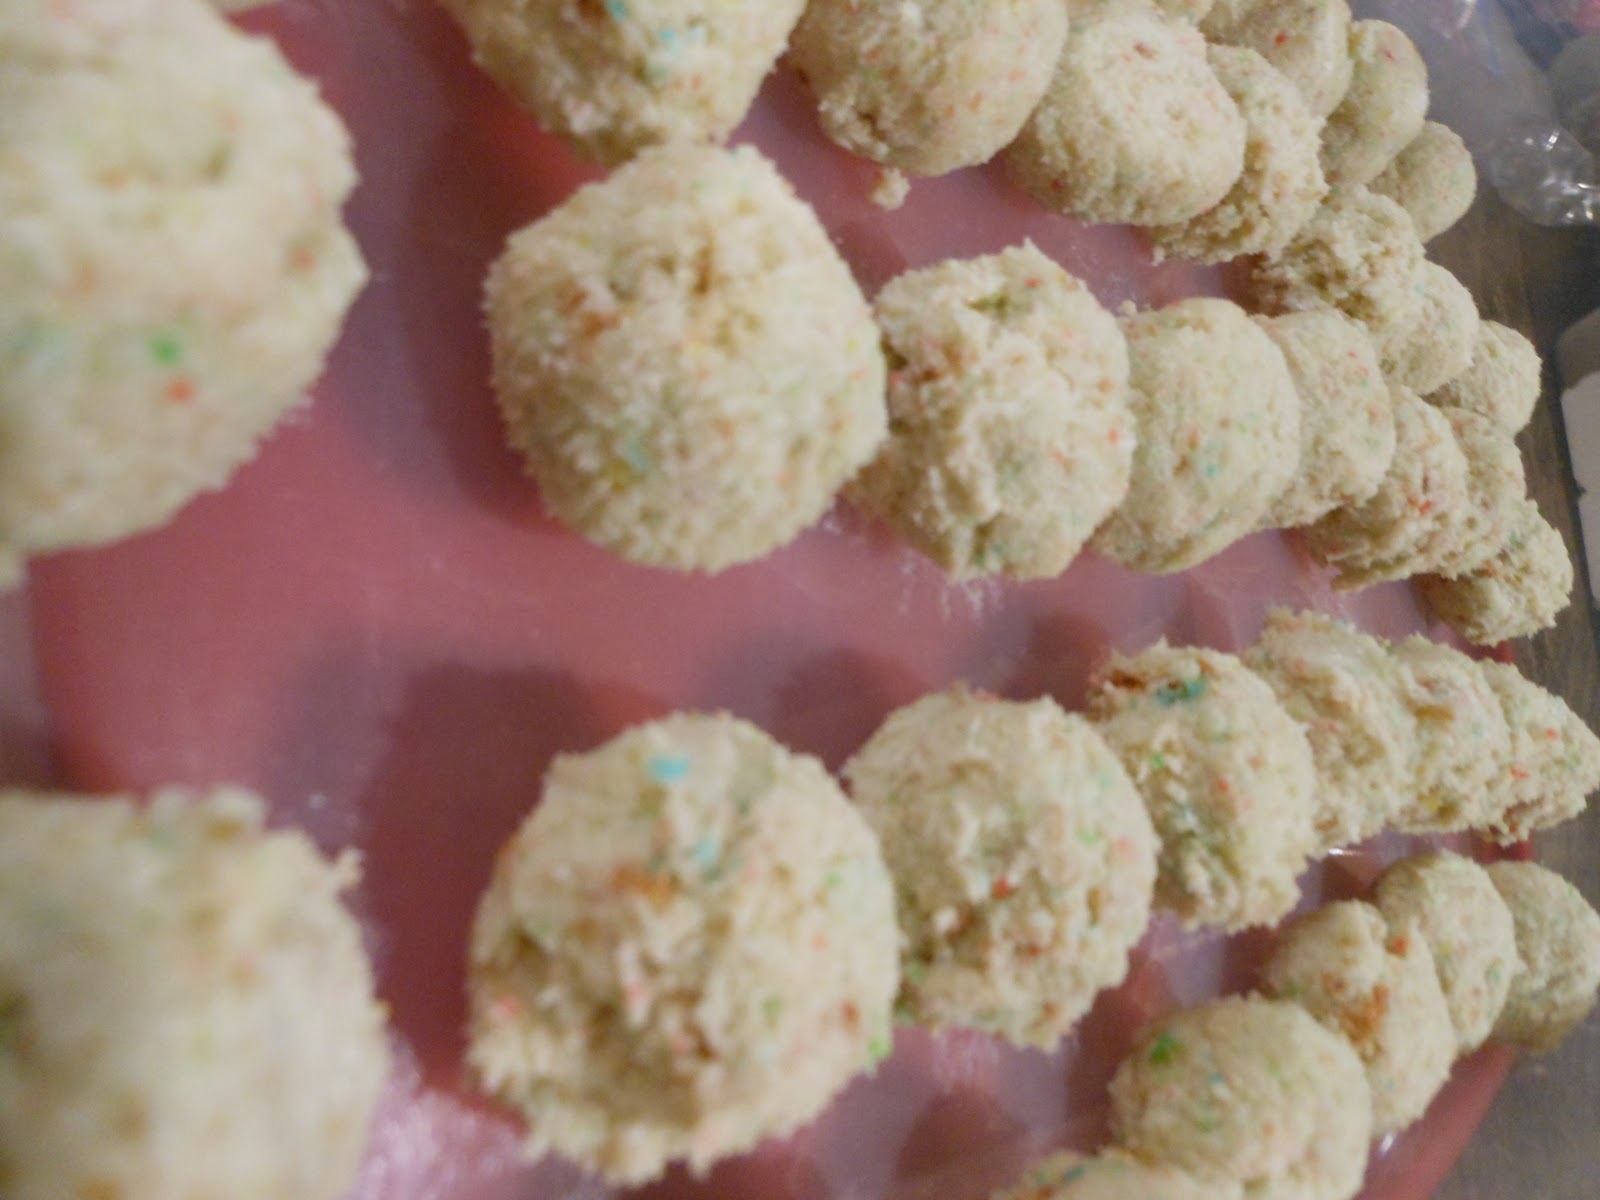
Step #5: BALL it up!
- I like to use a mini ice cream scoop for balling since I like the balls to be even in size. But you can use your hands, melon baller, tablespoon, etc... Now each cake recipe will be different but the amount of cake balls can be from 50-85.
Step #6: Back to the FREEZER.
- I usually layer the balls on wax paper in a Tupperware container and store in the freezer for at least an hour. Most of the time, I do overnight. It doesn't make the cake balls any harder if you keep it in there longer. I think the cake balls hit a certain temperature at which they are able to freeze. They should never get truly frozen. When you take them out they should be chilled but not frozen. Some cake batches (depending on moisture level) freeze harder than others.
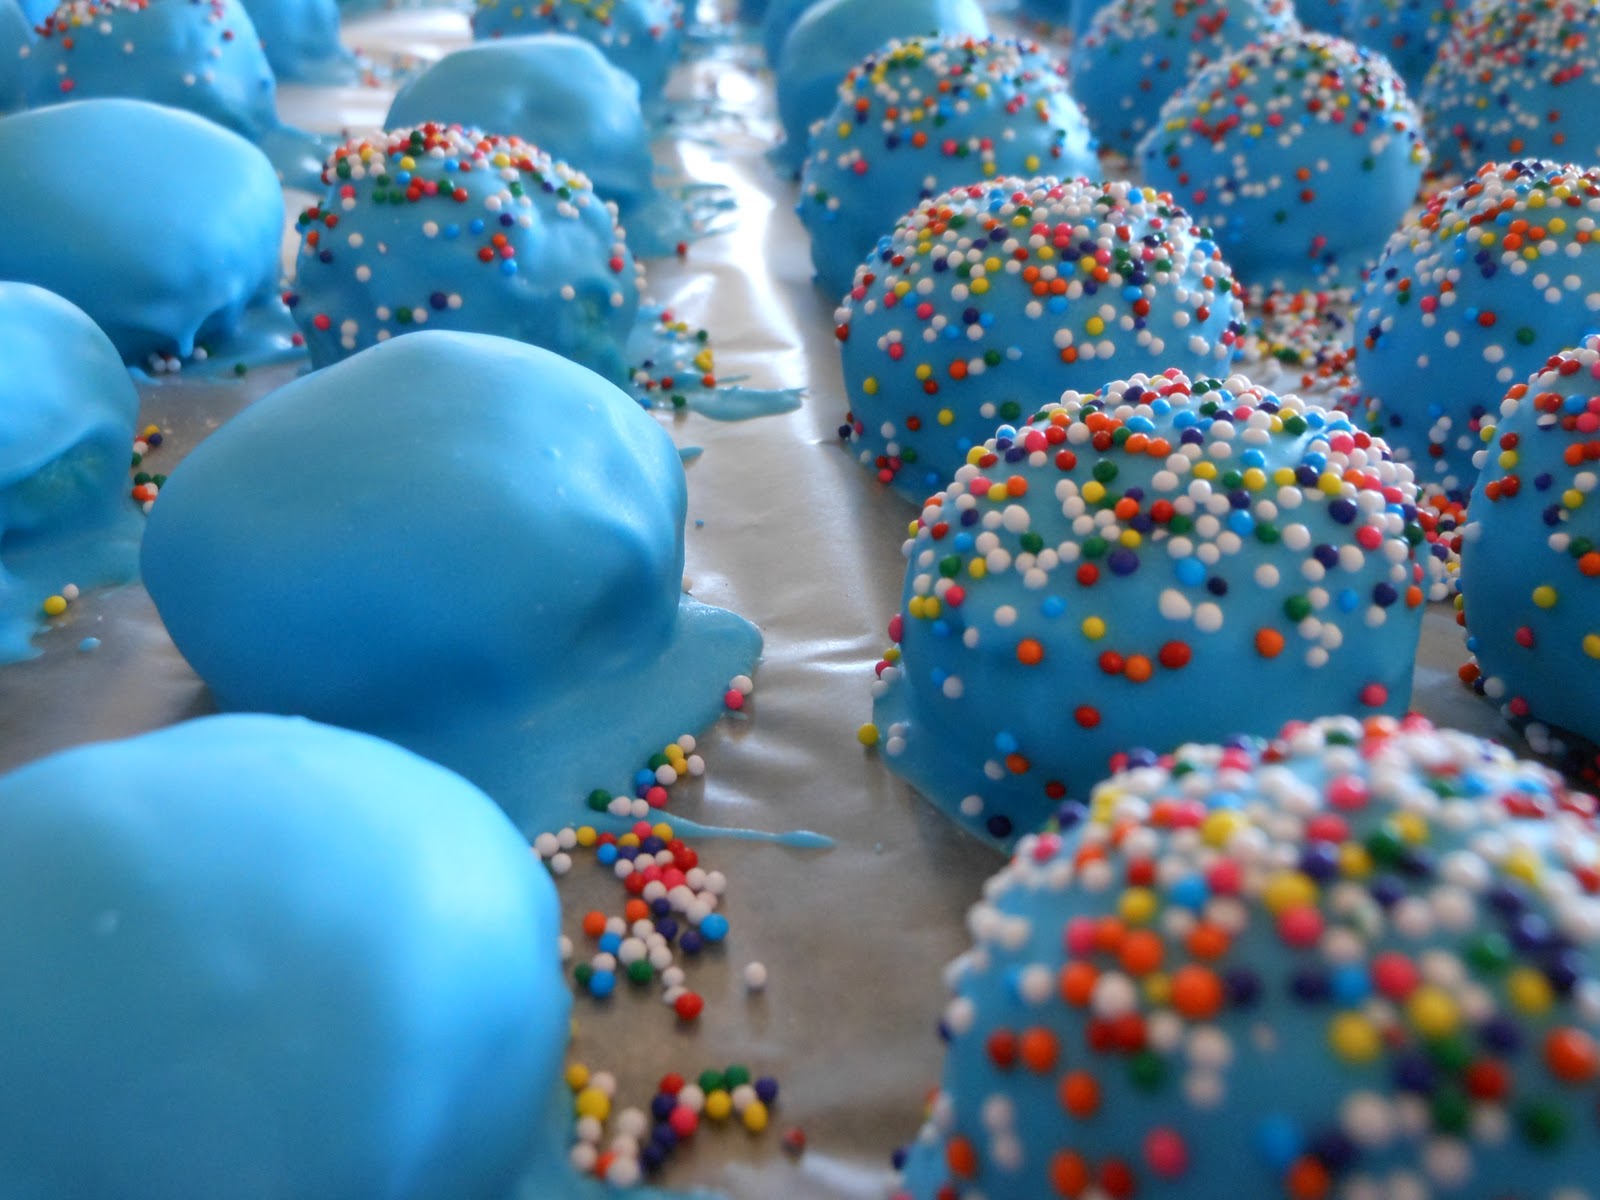
Step #7: Let the DIPPING begin!!

- Ah! Chocolate can so easily stab you in the back! Many times I have thrown away scorched chocolate. I will only use ONE brand of chocolate. SERIOUSLY. Please listen, I have tried many different types and brands but one that works flawlessly every time. Are you listening?? WALMART Almond bark. It's $2.88 a pack.
- Follow directions carefully!
I have found two ways that WORK as far as maintaining the consistency of the melted chocolate:
- Baby CrocPot -- This little CrocPot has become the BEST helper with cake balling. What's fantastic is that you can microwave the chocolate in the container then put in back in the warmer to keep it at the right consistency while you cake ball for hours!! Microwave chocolate bark (aka almond bark or baking chocolate) for 60 seconds or as directions suggest for your particular brand. Take it out then stir with a metal spoon. If it's still lumpy after a good stir, put it back in for 15 seconds at a time. DO NOT overheat! Again, continue to stir until chocolate is smooth (no lumps). Place it back in the little CrocPot warmer. Many times I have to turn the CrocPot off because I can tell the chocolate is getting too hot. It's usually okay to just place the CrocPot back in the heater without plugging it in. The consistency should be thick, but smooth.
- Double Boiler -- This way is also just effective but I like that I can move my CrocPot wherever I want it, instead of being confined to the area by the stove. PLUS, the CrocPot doesn't move around as much and you can melt more chocolate at one time. The key to the double boiler is DO NOT let the water in the bottom pan touch the top of the other pan. Turn on medium high at first to get the water to boil then turn down to low. Continually stir chocolate when melting.
- Here's the secret to SMOOTH Balls - Solid Shortening. After chocolate has melted, add a tablespoon of solid shortening and stir until completely smooth. You may have to press the spoon up against the wall of the pan or CrocPot to smooth out. THIS IS THE KEY TO A SMOOTH DIPPING. It is the difference between beautiful, yummy cake balls and those that are lumpy but yummy. You can use up to 3 tablespoons of solid shortening, but start with ONE.

- Do NOT ever add butter, milk, water, or oil to the melted chocolate (per the back on the almond bark)
- Only take out 4-6 cake balls from the freezer at a time. Roll the ball in your hands right before dipping to smooth the edges.
- The next trick is HOW to dip the balls if they aren't cake pops. Now if anyone has other suggestions, I am open ears but here's what I have found to the best. Find two plastic forks. Break one like a field goal post and like a pointer stick. One will be for stabbing and the other for taking off the pointer. See pictures ;)
- Place on wax paper to dry
- Fill in any holes with a little dollop of chocolate from a spoon, but not too much because it won't look natural.
- If you have excess chocolate forming a puddle around the ball, take a toothpick or something of the sort and run it around the bottom before it's hardened.
- Decorate your cake balls with sprinkles, spices, more candy coating, Oreos, Peanuts, or whatever else you can come up with.
- If you desire to color the candy coating you can ONLY use the dye specifically for candy. I know for sure that you can purchase this as Michael's Craft store. DO NOT use regular food coloring. This will NOT work.
- You can also buy a tube form of the colored candy coating so make other decorations on the cake balls.
**If you have left over candy coating, don't waste it!! You make other treats with it like chocolate covered pretzels or chocolate covered peanuts!!**
Here are a few of the beauties I and my sister-in-law have made together.

*Note* I did not know about the shortening method at this time. Be sure to check out the difference on another picture! But these are pumpkin flavored cake balls with cinnamon cream cheese icing. It is also decorated to look like a pumpkin! ;) I put the pretzel in the cake ball before the freezing process which caused them to be a little soggy in the middle but everyone still thought they were fantastic.
Since I've gotten better at this, here are some more I've created :)
These are my famous Oreo Cookie Cake Balls! Yum. Definitely a favorite!
I also have made:
- Lemon cake with lemon flavored icing
- Gluten free spice cake with cream cheese icing
- Funfetti with extra sprinkles in the batter with vanilla icing
- Cinnamon struesal cake with cream cheese icing
- Pumpkin cake with cream cheese icing
- Chocolate cake with chocolate icing
- Strawberry cake with strawberry icing dipped in chocolate
Be creative!!! Let me know if you have any questions!